In part 1 of this series I discussed the huge realization I had that writing a book was going to be actual work. I have no idea how I got it in my head that I could just bang out quality content with no real plan and without any professional equipment or skills. Ha!
One of the first things I realized I would need to upgrade was the organization of the content I was creating. I had a random Google Doc filled with clusters of notes about various Japanese ingredients, a folder in iPhoto with all of the pictures I’d taken that had been edited to the best of the software’s ability, and some vague ideas in my head about what each page of the book would need to say and how it would all look. It was obvious that I needed to start pulling all this various stuff together and start laying it out closer to how I would display it in the book. Enter, Anthologize…

Anthologize is a free WordPress plugin that allows you to write a book as if it were a series of blog posts. You can either use it to pull together existing blog content into a book format, or you can create new content by making a separate draft page for every page of your book and filling it with new material. I found it really helpful because I didn’t have to learn anything new to use it. I could write each page as if I were writing a blog post, laying out all the text and photos as I thought they might appear in the final book. I still have all the draft posts on my blog from when I was using Anthologize to write The Japanese Pantry, and I’ve even started my next two writing projects with it, using it to store my notes and ideas until I can start putting them into action.
I have to say that Anthologize is not perfect. It can be a bit slow to load changes and it’s somewhat cumbersome to go make a blank post draft first and then go into Anthologize and add it to your project. I would not recommend it for a book that has many parts or chapters. Mine had about 30 parts that I frequently needed to make changes to, and I’d say that was about the limit of how many parts I would be able to manage in this format. It is, however, free. It’s also much better than the scattered mess of book content I was dealing with before. I may look for something else to use once I start headlong into my next writing project, but I may not.
The other thing I needed to decide on before I could move forward was what service to use for publishing. I started out with a self-publishing service called Lulu, which is one of the more well-known and widely used online publishing tools. After trying to fit my content into some of their book-writing templates and looking at their costs, I decided that Lulu was not going to work for this particular project. I didn’t like any of the book layouts I was being forced into, I found the workflow tedious and confusing, and I was going to have to price my finished book very high to make any profit. After some more shopping around, I came upon my current self-publishing service – CreateSpace…

I decided to go with CreateSpace for several reasons. They’re owned by Amazon.com so they come equipped with a reputable sales channel that many people already use and feel comfortable buying from. Their production costs are low and their cut of the royalties is very reasonable; the author also has full control over setting the sales price to insure they receive an adequate royalty on each sale. There is an author dashboard that helps you keep up with all of the steps that need to be completed to make a book ready for sale…

CreateSpace also offers services for designing a book cover, laying out your book content, and marketing the finished work – all optional at an extra cost. You can even make a Kindle-ready version of your book fairly easily. Also, you can purchase an ISBN number (the unique numbers around the book’s barcode that serve to identify it electronically) for a drastically reduced cost through CreateSpace, as opposed to purchasing one directly from Bowker, the company all books published in the U.S. are registered with.
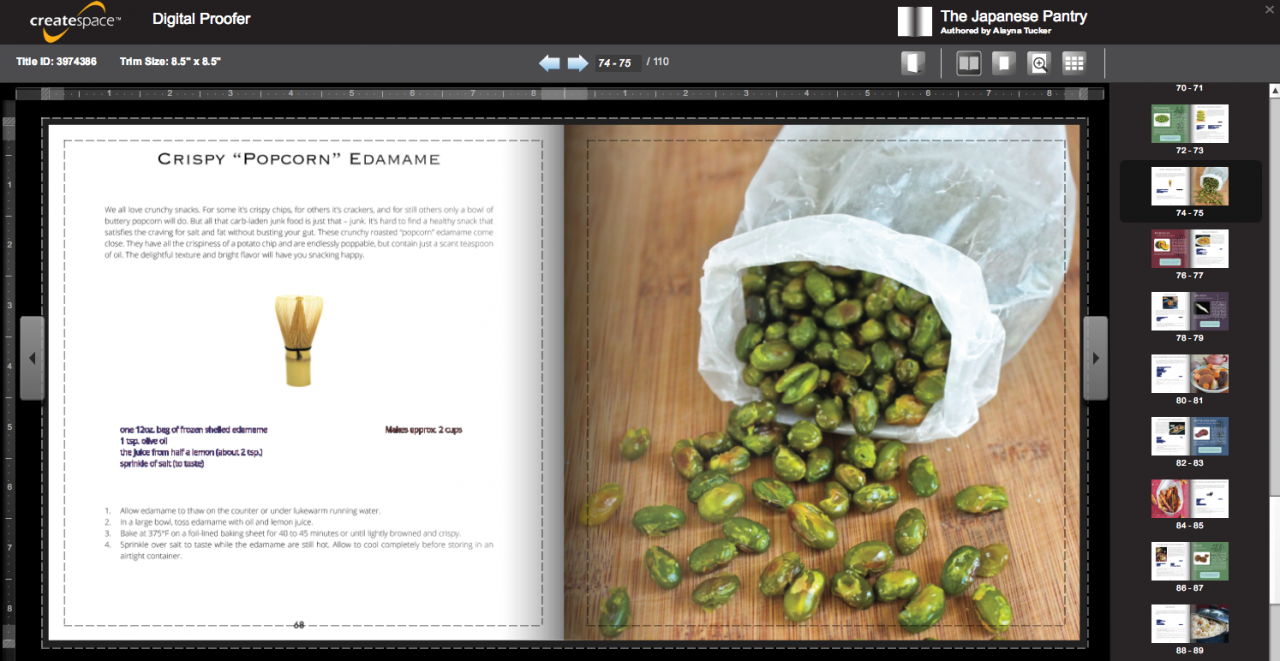
Unlike Lulu though, you cannot compose your book directly on the CreateSpace website. You must write it using your own software and then upload it in an appropriate format to CreateSpace. Once uploaded though, CreateSpace can check it for printing errors online using their Digital Proofer feature. It allows you to flip through your book as if it were sitting right in front of you, but with helpful annotations showing you exactly where you need to make adjustments to make your book files printable. It’s a little buggy though, and often shows errors that truly don’t exist. If you’re confident that you’ve fixed any real issues, you can skip this step and have it reviewed by an actual human to confirm that it is indeed printable.
All in all I’ve been really happy with CreateSpace and will absolutely use them for any future self-publishing I do. Their customer service was able to help me with some issues I was having, and there are tons of support forums that will answer nearly any question you can think of. I would highly recommend them if you ever decide to self-publish a book of your own.
That was a long one! In the next part of this series I’ll talk about photography – how I improved my skills and what equipment I used.